Typography - Timing and Design
*There are three ways to work on this project - through lecture demonstration, following the instructions below or use the Lynda link at the bottom of the page
- Set up the scene first
- Import jump_slomo.mp4, H_Score_24bit_48k.wav, H_Sport_layer.ai, and H_Sport.ai files into your project panel
- Drag the Jump_slomo.mp4 to the Create new Comp icon on the project panel
- Trim the video to emphasize the athlete jumping and landing (Somewhere between 13:00 - 18:00)
- Drag the trimmed part over to 0:00
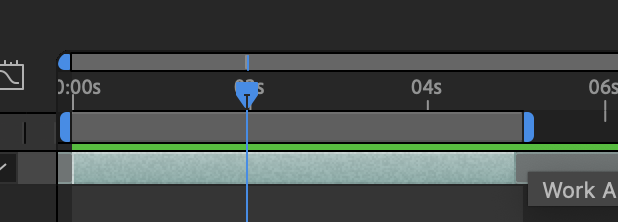
- Use the Workspace limiters to help with previewing
- An example of improving the timing
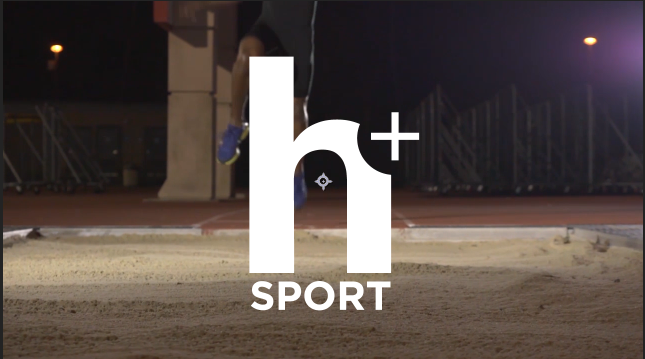
- Start by placing the H_sport.ai object on the timeline above the video clip - This centers it automatically. Pull the time indicator to approxomately where you want the action. I feel it looks best right at the peak of the jump around 3:11
- You might want to take the opacity down a bit for a softer look (Cmd/Ctrl T)
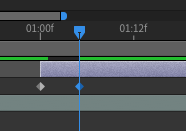
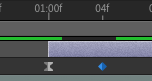
- Open the position (P) value of the H_sport.ai on the timeline and set a keyframe
- Drag the time indicator back 1 sec and then pull the object off to the right. This is reverse keyframing, where you set the end first.

- Now preview the animation (space bar)
- kind of boring...so let's speed it up
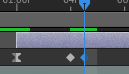
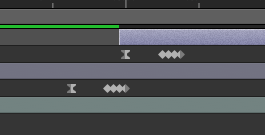
- Drag the end keyframe over to the left so that it's about 5 or 6 frames after the first frame
- Still too linear
- Add an easy ease to the last keyframe - rt/ctrl click the keyframe=>Keyframe assistant=>Easy Ease
- Try switching the ease to the first and see how it affects the animation
- Open up the graph editor to see the visual aspect of the ease

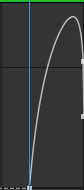 Make sure speed graph is selected if you don't see this
  .
.
- We will add it to the first in this case for a snapping effect
- We can still add some subtlety with an overshoot
- Keyboard shortcuts for nudging the timeline:
- Cmd/ctrl right/left arrow key to go to the next frame
- Shift Cmd/Ctrl arrow for about 10 frames
- Shift arrow nudge the selected element on the stage
- You can slightly nudge the element by hitting the arrow keys and nudge more by adding the shift key
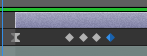
- With the indicator on the last keyframe hit the shift + left arrow key to start the overshoot (nudges the logo to the left)
- Create a snap back by advancing a keyframe (Cmd/ctrl rt arrow) and then shift + rt arrow and then 5 right arrows (without the shift key)
- Advance one more keyframe and copy/paste the first keyframe of the series to return to set the final location
- Add a motion blur
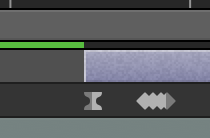
- Trim the layer so that it starts right at the animation:
- Triple the effect by duplicating the layer (Cmd/crtl D) and then dragging on the timeline to the right
- And duplicate it again for three versions
- Now preview the animation. It has a subtle snap to it and doesn't look so static
- Now let's add the end logo animation
- For now we can just use a fade out transition
- We want all elements to fade out so select all layers and rt/ctrl + click and choose Pre-compose. Name it so that it's easily identifiable
- Start a fade out as a reaction to the athlete landing
- Expose the Opacity property (T) and do a quick fade out...about 3 to 4 frames
- Next we'll create a background with type.
- Create a new solid Layer=>New=>Solid. Choose a mid tone to dark color and name it background and drag it below the Pre comp
- Drag the H_sport.ai object over the background layer, turn it black: Effects=>Channel=>Invert
- Now add text with the text tool: rebuild + nourish. Line it up with logo and create some good typography
- Make sure it's black

- Now to make this more interesting (and we should) we are going to add some animation to the logo
- Select the rebuild + nourish text and position the time indicator about where the fade in happens
- Open the Effects and Presets panel (Window=>Effects and Presets) and twirl down Animation Presets and twirl down text and 3D text. You can play with different choices by double clicking the presets and see the effect
- Choose an appropriate effect...not something cheesy!
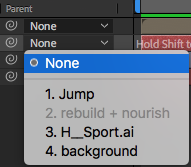
- Now we will animate the scale of both objects. Instead of precomposing we will use the parent mode
- Select the text layer and parent it to the H_Sport logo layer
- Then animate the scale of the logo at the reveal from 80% to 100% at the end
- Still a little flat
- There are a number of things we can do to give it more depth. I'm going to use a light and 3D to give it some depth
- Go to Layer=>New=>Light and choose Point light and 160 intensity...make sure it is on top of the layers
- Go to the background layer and enable 3D
- You can also animate it by keyframing position and intensity etc
- Try pulling it over to the right and then animate it the left at the reveal
- Now we are going to play with effects
- Take out the fade out from the pre-comp layer...we are going to replace it.
- Make sure you leave the time indicator where the fade out started
- To apply an effect go to the Effects menu - There are thousands!
- You may want to play with Effect>Transitions...they will apply where ever the time indicator is
- We will use Effect>Simulation>Shatter, but you can use what you feel is most appropriate
- This effect has no keyframes so some either need to be set or attributes need to be manipulated for control
- Can be applied to any layer (shape, video, image etc)
- Effects=>Simulation=>shatter
- By default, will convert layer to wirefame, but you can change this under the View attribute (render will show the actual content)
- Under Shape>Pattern you can choose the type of shatter effect
- Force 1>Radius will determine the area of the effect
- This is how to control the timing of the effect - set the keyframe to 0 and the move the time indicator over to the final position and increase.
- Physics>Gravity will increase the speed of falling shards.
- Now add the sound file to the bottom of the timeline and preview
- Expand the work area to encompass the amount of video you want to render
- Render the full composition (not the pre-comp) it with Media Encoder to get an .mp4
- Save your work!
*From Lynda - Animate the timeline | precompose | Design an animated transition | Animate the Type | Light the scene